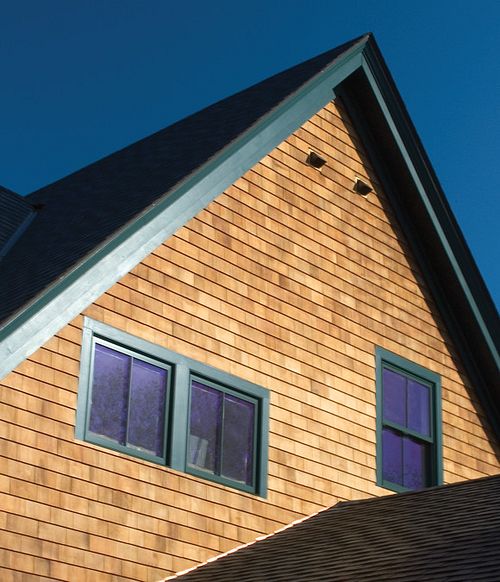
Cedar shakes and shingles are beloved for their natural beauty and timeless appeal, but achieving a durable, long-lasting installation starts with using the right fasteners. Whether you’re a seasoned contractor or a DIY enthusiast, selecting the best nails for cedar shakes and shingles is crucial for ensuring a secure fit, preventing corrosion, and maintaining the aesthetic charm of your cedar work. In this article, we’ll explore what to look for when choosing nails for cedar roofing and siding, along with best practices for installation.
Why Nail Selection Matters
When it comes to cedar, the nails you choose play a pivotal role in the overall performance and longevity of your project. Here are some key reasons why proper nail selection is essential:
- Corrosion Resistance: Cedar contains natural tannins and oils that can react with certain metals, leading to corrosion. Corroded nails not only stain the wood but also weaken the hold over time.
- Holding Power: The right nails ensure that shakes and shingles remain securely in place, even during severe weather. Adequate holding power minimizes the risk of wind uplift and water infiltration.
- Preventing Splitting: Cedar is a relatively soft wood. Using nails that are too large or improperly installed can cause the wood to split, affecting both the appearance and structural integrity of your cedar work.
Key Considerations for Selecting Nails
1. Material and Coating
Galvanized Nails:
Standard galvanized nails come coated with a thin layer of zinc to provide basic corrosion resistance. They are commonly used in cedar applications but might not be sufficient in high-moisture or highly corrosive environments.
Hot-Dipped Galvanized Nails:
For enhanced protection, hot-dipped galvanized nails offer a thicker zinc coating. This additional layer provides improved durability and is highly recommended for cedar installations, especially in areas exposed to moisture.
Stainless Steel Nails:
For maximum corrosion resistance, stainless steel nails are an excellent option. Their high resistance to rust makes them ideal for cedar work in humid climates or coastal regions where salt exposure is a concern.
2. Nail Design and Shape
Ring Shank (Annular Ring) Nails:
These nails feature ridges or rings along the shank, which create extra friction within the wood. The added holding power from ring shank nails is particularly beneficial for cedar, ensuring that shakes and shingles remain firmly attached.
Smooth Shank Nails:
While smooth shank nails offer a cleaner appearance, they may not provide the same level of grip as ring shank nails. If aesthetics are a priority, ensure that smooth shank nails are specifically engineered to offer sufficient holding strength for cedar.
3. Size, Length, and Diameter
Appropriate Length:
Choosing a nail that is long enough to penetrate the cedar and embed securely into the underlying substrate (such as sheathing) is crucial. Generally, the nail should extend at least ¾ inch to 1 inch into the substrate to provide a robust hold.
Diameter Considerations:
While thicker nails offer increased strength and resistance to bending, using a nail that is too thick can lead to splitting the delicate cedar material. A balanced approach that considers both durability and the wood’s integrity is key.
4. Head Style
Larger, Flat Heads:
Nails with larger, flat heads help secure the cedar without allowing the fastener to sink too deeply into the wood. This is important for maintaining proper water shedding and the overall aesthetic of the roof or siding.
Finishing Heads:
In some cases, a smaller nail head may be desirable for a less intrusive look. However, make sure that these finishing nails are still capable of providing adequate holding power for the long term.

CSSB Guidelines for Fastener Use
The Cedar Shake & Shingle Bureau (CSSB) sets industry standards to ensure the longevity and performance of cedar products. According to CSSB guidelines:
- Two Fasteners per Unit:
Certi-label™ shakes or shingles must be applied with two fasteners to ensure a secure installation. - Nail Material Requirements:
- In locations within 15 miles of salt water, only stainless steel Type 316 nails should be used due to their superior resistance to the corrosive effects of salt.
- Outside the salt water zone, you may use either Type 304 or Type 316 stainless steel nails, or hot-dipped zinc-coated galvanized nails.
These requirements emphasize the importance of using fasteners with high corrosion resistance—especially in challenging environments—to protect both the aesthetics and structural integrity of your cedar installation.
Best Practices for Installation
Even with the best nails, proper installation is critical to maximize performance. Follow these tips to ensure a successful cedar installation:
- Pre-Drilling:
To minimize the risk of splitting the cedar, especially near the edges, pre-drill pilot holes before driving in the nails. This step can significantly reduce stress on the wood during installation. - Correct Spacing:
Adhere to manufacturer guidelines for nail spacing. Over-nailing can cause unnecessary stress and potential water leakage, while under-nailing might compromise the structure’s stability. - Drive Nails Flush:
Ensure that nails are driven flush with the surface of the cedar. Over-driven nails can damage the wood, while under-driven nails might not provide a secure seal against the elements. - Regular Maintenance:
Even after installation, periodically inspect your cedar work for any signs of nail corrosion or loosening. Early detection of issues can prevent more extensive damage and maintain the longevity of your project.
Additional Tips for Long-Term Durability
- Choose Quality Over Cost:
Investing in high-quality nails designed specifically for cedar work can save you money in the long run by reducing maintenance and repair needs. - Consider Environmental Factors:
If your project is in an area with high humidity, coastal exposure, or extreme weather, lean towards nails with the highest corrosion resistance (like stainless steel or hot-dipped galvanized nails). - Consult Manufacturer Recommendations:
Always check the guidelines provided by the manufacturer of your cedar shakes or shingles. They often offer specific recommendations for fasteners that have been tested for compatibility with their products.
Best Nails for Cedar Shakes and Shingles
Choosing nails for cedar shakes and shingles is a vital step in ensuring the durability, beauty, and performance of your cedar installation. By focusing on corrosion resistance, holding power, and proper nail design, you can make an informed decision that protects your investment and enhances the natural charm of cedar. Remember, even the best nails require proper installation practices—pre-drilling, adhering to correct spacing, and regular maintenance are all essential for achieving a long-lasting and secure cedar installation.
For those seeking reliable, high-performance fasteners for their cedar projects, Simpson Strong-Tie offers a range of nails and fastening solutions engineered to meet the demands of cedar installations. Their products provide excellent corrosion resistance and holding power, making them a trusted choice among professionals in the construction industry. Best of all, you can order these top-quality fasteners wholesale through Capital Forest, ensuring you have the right materials to keep your cedar shakes and shingles secure for years to come.
